Ingredients
- 1 red bell pepper, thinly sliced
- 1 zucchini, thinly sliced
- 6 large mushrooms, thinly sliced
- 6 tablespoons extra-virgin olive oil, divided
- 1 tablespoon salt
- 2 teaspoons ground black pepper
- 1 cup water
- 1 bunch kale, torn into bite-sized pieces
- 2 cloves garlic, chopped
- 2 (26 ounce) cans pasta sauce
- 1 (12 ounce) box no-boil lasagna noodles
- 9 cups grated mozzarella cheese
- 1 (8 ounce) package bocconcini cheese, thinly sliced
Why This Dish Is Amazing
Kitchen Advice
- Use fresh kale and remove the tough stems for a better texture.
- Allow the lasagna to rest for 10 minutes after baking to help it set and make serving easier.
Step 1
Gently heat your oven to 450°F (230°C) and lining a baking sheet with foil. Chop up the red and yellow bell peppers, zucchini, and mushrooms, then toss them with 4 tablespoons of olive oil, salt, and pepper in a bowl. Spread the veggies out evenly on the baking sheet and roast them for about 10 minutes. Give them a good stir or flip, then roast for another 10 to 15 minutes until they’re nicely browned.
Step 2
While the veggies are roasting, bring a pot of water to a boil and add the torn kale. Let it cook just until it turns a darker green, about a minute, then drain it well. In a frying pan, heat the rest of the olive oil over medium heat, add the garlic, and cook it for a minute until fragrant. Toss in the kale and sauté it until it’s wilted, around 3 to 5 minutes, then take the pan off the heat.
Step 3
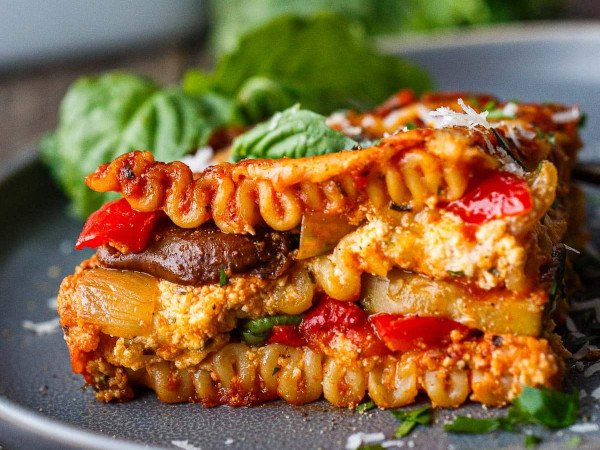
Once the peppers are done, lower your oven to 375°F (190°C). In a 9x13-inch baking dish, start layering your lasagna: spread a bit of sauce, then a layer of noodles, followed by the roasted veggies and some grated mozzarella. Next, add another layer of noodles, more sauce, the sautéed kale, and slices of bocconcini. Keep layering everything up, making sure noodles and sauce go together so the noodles don’t dry out.
Step 4
Pop the assembled lasagna in the oven and bake until it’s bubbly and the noodles are tender, about 45 minutes. Let it rest for 20 to 30 minutes before slicing and serving—it’ll make it easier to cut and even more delicious!